How to install XAMPP on linux?
What is XAMPP?

XAMPP is a free and open-source cross-platform web server solution stack package developed by Apache Friends, consisting mainly of the Apache HTTP Server, MariaDB database, and interpreters for scripts written in the PHP and Perl programming languages.
X = Suitable For Any OS (Cross-platform)
A = Include Apache Web Server
M = Include MariaDB Database (PhpMyAdmin)
P = PHP
P = Perl
How to download it?
Visit Official website of XAMPP and download suitable version for your OS.
This link will directly bring you to the download page. 👇👇
https://www.apachefriends.org/download.html

Install XAMPP on Linux
Make the installation package executable
We will install the package through the Linux Mint command line(But this can apply for any Debian Based OS), The Terminal. In order to open the Terminal, either use the Dash or the Ctrl+Alt+T shortcut. After the Terminal is open, you need to move to your Downloads folder to access the file.
💢 Move to the Downloads folder by using the following command:
$ cd /home/[username]/Downloads

💢 Type below command to see what are the inside in Downloads folder
$ ls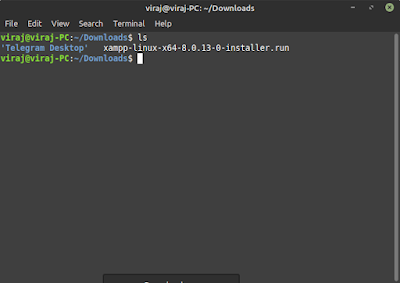
💢 You can see your downloaded XAMPP run file in the folder.
💢 The installation package you downloaded needs to be made executable before it can be used further. Run the following command for this purpose:
$ chmod 755 [package name]
Confirm execute permission
💢 It is important to verify if the package can be executed by the current user. The executed permission can be checked through the following command:
$ ls -l [package name]
💢 The -rwxr output shows that the file can be executed by the user, whose name is also mentioned in the output.
Launch the Setup Wizard
💢 As a privileged root user, run the following command in order to launch the graphical setup wizard. You need a root Password for that.
$ sudo ./[package name]

💢 This will launch the Setup wizard that will direct you with the rest of the installation procedure.
Work through the graphical setup wizard
💢 Now that the Setup Wizard for XAMPP by Bitnami is launched as follows, click the Next button to start the installation process:

💢 The following dialog lets you choose XAMPP components that you want to install.

💢 Keep the default settings intact and then click Next. The following dialog will inform you about the location where XAMPP will be installed.

💢 Click Next to begin the installation process:

💢 When the installation is complete, click the Next button. The following dialog indicates the completion of the installation process.

💢 If you do not want to Launch XAMPP at this moment, uncheck the Launch XAMPP option. Also, click Finish to close the Setup dialog.
Launch XAMPP through the Terminal
💢 In order to launch XAMPP through your Ubuntu Terminal, enter the following command as root:
$ sudo /opt/lampp/lampp start

💢 This output shows that XAMPP is started and running. Please note that you need to manually start XAMPP each time you restart your system.
💢 Stop XAMPP run follow command:
$ sudo /opt/lampp/lampp stop
Verify Installation
💢 After you have installed XAMPP on your Ubuntu system, it is good practice to verify the installation. To do so, enter the following URL in your Web browser:
http://localhost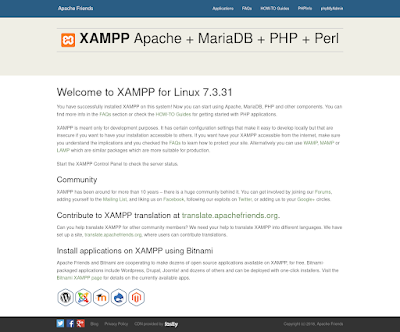
💢 You can also verify the installation of PhpMyAdmin similarly by entering the following URL in your browser:
http://localhost/phpmyadmin

💢 Congratulation, you successfully installed XAMPP on your Linux PC
💢 If you want to know more about XAMPP installation, visit 👉 HERE 👈
💢 If you got any problem, please comment down in here, and I'm happy to answer them.


Comments
Post a Comment